top of page


MECHANICAL
CV Carburetor
Conventional fuel injection systems?
Mainly due to the increased power demand and even stricter emission standards, I can safely say in connection with petrol engines of vehicles that almost all types of carburetors have been completely pushed out of the market by electric injection, and almost the same trend can be observed for conventional and semi-electric dosing units for diesel engines too.
However, as far as carburetors are concerned, perhaps there could still be some quite surprising counter-examples - such as the carburetor of the popular Suzuki DRZ 400 S/SM models - which are still in series production, but we need to recognize that this process is slowly coming to an end too.

On the other side, as far as diesel dosing units are concerned, the fully mechanically controlled dosing systems have long been replaced by the semi-electrically controlled - such as the well-proven Bosch VP44 shown in the picture below - dispenser systems, but these too will soon be found only in the interesting history books. By now, the diesel engines with incredibly high injection pressures - up to 1800 bar - are the leading trend, and the more durable intake diesel engines - with an injection pressure of just one hundred bar - are considered especially obsolete.

However, the newest constructions are not necessarily better. Let’s just quickly see a crucial difference between them. Just think of the fact that the crankshaft of conventional intake diesel engines was originally strong wrought iron, while modern high-pressure turbo diesel engines are manufactured only with ridiculously fragile cast aluminum crankshafts, which were broken very quickly by the strong torsional torque changes - which is particularly characteristic for all diesel engines - and that is exactly the reason why dual-mass flywheels had to be installed, which - as an over complicated forced solution - greatly increased the unreliability of the whole system in the long run.
All I can say about this is that let’s not forget that tuning always involves serious compromise, and in spite of all these, it is worth knowing about conventional fuel injection systems as well, and that can even be especially useful if we can maintain them. If we could even understand how to adjust them precisely, it would already be a separately appreciated profession. Partly for this reason - in this short article - I would like to present the maintenance of a more complex CV carburetor, and the diesel dosing unit shown in the image below will be the subject of a later exciting article.

Constant Vacuum Carburetor
Let’s start with the fact that there are a lot of different constructions of carburetors from the simplest to the most complex. The constant vacuum carburetors are those that currently operate in large numbers on high-performance motorcycles in either 1-cylinder or even in synchronous mode on series cylindrical engines.
On top of all that, it’s worth mentioning that this is also my favorite carburetor category too.
Nowadays, the fairly complex and sensitive membrane carburetors are only allowed in garden machines, about which I also wrote an especially exciting review in my article ‘Husqvarna 40 Maintenance’. I did not accidentally mention the Suzuki DRZ 400 S/SM models in the previous paragraph, as the central subject will be here the famous Mikuni BSR36 CV carburetor.

How it works?
How does this fairly complicated fuel supply component work basically? I disassembled this guy many times, analyzed it, adjusted it back and forth, blew it into every vent, and watched where the air came from, and so on. So finally I was able to understand nicely the working principle of each area as well. In terms of its operation, we can start with the well-known fact that the carburetor is responsible for adjusting and delivering the appropriate air-fuel mixture to the cylinder.
Let's start maybe there that when the piston moves downwards - in the suction stroke - it can generate a vacuum, and as a result of this air will flow into the carburetor through the intake manifold. As can be seen in the title that it is a constant vacuum carburetor, so it can be already guessed that the very fine air flow impulses will play here an especially important role in the well balanced operation.

This assumption is pretty good because the largest diaphragm sits on top of the carburetor in the membrane housing, and has a rather complex and crucial function. First of all, this part is responsible for providing a constant vacuum pressure, in such a way that it has to drive the valve piston - in other words the throttle slide - very precisely together with the Schuber needle - the long needle slider in the pictures with 5 adjustment levels on which some dried gasoline residue can also be seen - attached to it.

This membrane is able to move - with continuously pulsating movements corresponding to the engine speed - under the influence of the air flow entering and leaving the membrane housing. In ideal case this air flow - required for optimal membrane operation - can reach the diaphragm through the vent holes, which can be found at the bottom of the the diaphragm housing - and at the bottom of the valve piston - in such a way that there are two upper air passages inside the carburettor intake pipe, through which the inflow of air from the air filter housing can lift up the diaphragm against the large spring. As the engine speed increases, the amount of intake air also increases, so the diaphragm can rise to a greater extent, and as a result of this the valve piston must also move to a higher position together with the Schuber needle, which controls finally the amount of fuel flowing through the main nozzle.

So we have now reached the other critical point, namely the fuel supply.
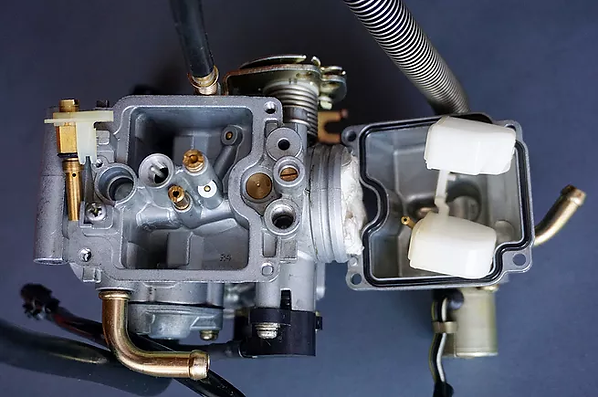
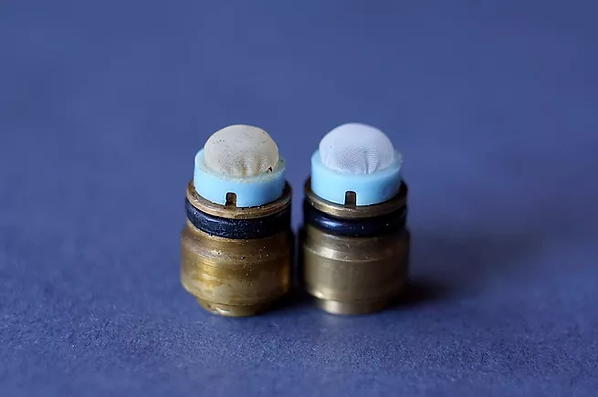
The fuel enters the carburetor through the rubber fuel hose on the left side of the carburetor, and first flows through a microfilter all the way to the needle valve, which is controlled by the position of the white plastic float.

In this way, the petrol collects in a well-controlled way in the float bowl at the bottom of the carburetor, from where it will be further transported by the nozzles in the next steps.

As for its maintenance, this rubber-tipped needle valve can vibrate sideways if it is too outworn, which can result unexpected leaks and thus will no longer be able to control the proper gasoline level. In such a case, it must be replaced as soon as possible, as it can be a source of serious problems such as engine oil dilution, which can even lead to complete engine damage.

I also note here that the swing mechanism of the white plastic float is well adjusted if the edge of the float is parallel with the lower edge of the carburetor, if the carburetor is upside down on the table as shown in the picture below. Anyway, according to the technical specification, the distance must be between 12 and 14 mm.

At low engine speed - to about 1/3 throttle level - the small - in this case the OEM 22.5 - copper nozzle - also known as primary jet - is responsible for fuel supply which has a separate long, thin copper mixing tube, which in itself is responsible for the quality of the homogeneously sprayed gasoline - if this part is pretty clean - and at higher engine speeds the already mentioned main nozzle - in this case the OEM 142.5 main jet - operates, which also has a separate long, thicker copper mixing tube, into which the already mentioned fairly long Schuber needle hangs.
Keep in mind that the perfect profile screwdriver head is essential for disassembly, as it must fit extremely precisely, because the screws are usually very fine small sensitive copper screws, and the nozzles are also made of copper without exception.

During maintenance, I simply clean them with a brake parts cleaner and an air compressor, but in very severe cases, these copper nozzles can even be cleaned in a very fine way with the reamer shown in the picture, but this requires practice as the cross section can be accidentally expanded. What needs to be cleaned of these dirt-sensitive parts? I would say mainly the resin content of gasoline, but in the worst case, the deposited aluminium-oxide and other gelatinous gasoline residues are already a more serious challenge.
Pay special attention to the cleaning of the fine microfilter, as it is also a very sensitive part that should not be cleaned with an EGR cleaner or too high air pressure or even mechanically.

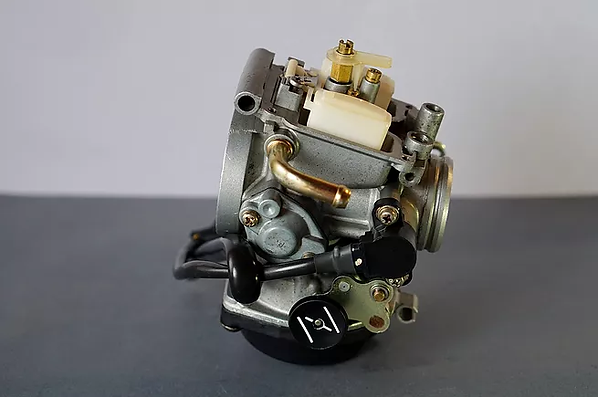
Right in front of the main jet sits also a third nozzle which is the startup jet, which is responsible for enrichment, and the fuel enrichment screw is located on the bottom of the carburetor - the small yellow flat head screw - on the cylinder side, and a separate intake air volume screw is not included for this type.
Keep in mind that the factory standard carburetor settings were adapted to the factory clean air filter and the original 2-chamber exhaust system. In my opinion, it is especially worth keeping these settings and in no way twisting these adjusting screws for testing, but rather pay attention to the pharmacy cleanliness of the carburetor.

Let’s look at the additional subcomponents in broad lines.
This carburetor has a fairly sophisticated structure, which includes a TPS sensor, an accelerator diaphragm, and an idle stop solenoid valve too.
The TPS sensor is simply the throttle valve potentiometer on the butterfly valve shaft on the left side of the carburetor in a black plastic housing, and the smaller membrane - responsible for fuel enrichment - is also located on the left side of the carburetor, which should be inspected and cleaned periodically or replaced if necessary. Take care of it, just remove it carefully and it is advisable to apply a little silicone grease to the sealing surface during assembly.

What about the idle stop solenoid valve?
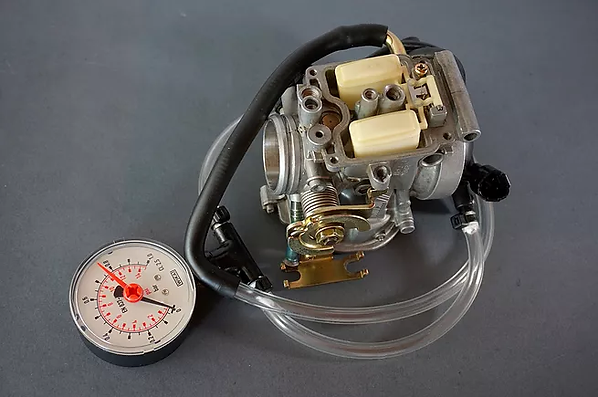
As we have already clarified, this carburetor operates with vacuum proportional to the engine speed, and the degree of the vacuum raises the valve piston - throttle slide - proportionally to this, and as a result, the intake air mass also increases, and thus the engine also gives more power. The idle stop solenoid valve is controlled by the engine control electronics and reduces the amount of vacuum created by the piston in the diaphragm housing using the separate bypass rubber hose connected to it.
This solenoid valve is closed by default and opens in its active state, and as a result of which the throttle slide can only be opened to a limited extent - as the amount of vacuum was reduced - and from here it is no longer difficult to guess that engine power will also decrease. Anyway, this kind of performance limitation is not available on all Mikuni BSR36 carburetors but is typically included in models intended for the European market.

DSC01671_edited

DSC01932_edited

DSC01935_edited

DSC01671_edited
1/3
There is only one component left, namely the manual enrichment switch to assist cold start.
Also on the left side of the carburetor, there is a manual 3-position fuel enrichment circuit with closed, half-open, and fully open positions.
This essentially moves a small piston that is able to drain a certain amount of vacuum from the diaphragm housing through a small hole, and due to the resulting vacuum reduction, the valve piston can only open to a lesser extent. Essentially it is the engine choke, although it works a bit indirectly. I only use this for a short time even in winter because the cold start of the engine is excellent.

Cleaning and Maintenance
Probably a lot of drivers have already experienced that long parking periods often have quite an unpleasant effect on vehicles.
If nothing else comes to mind about this unpleasant situation - other than a self discharged starter battery - I would say a few more interesting things. It is enough to mention the oxidation and corrosion itself or with noble simplicity the frost and UV load and if we go a little further, it is also worth highlighting the decomposition and acidification of fuel and oil - the deposits that result from this - and last but not least the dried seals and cracked rubber materials from which the connecting sulfur compounds have nicely evaporated.
So over time, amortization works pretty slowly even under these circumstances. Therefore, it is also worth keeping in mind that carburetor problems usually occur most often after long periods of parking, and that is why it is advisable to always start the motorcycle season with a profound and deep cleaning. Of course, wear and tear due to use, or replacement parts of poor quality, or an incorrectly assembled carburetor will also result in malfunctions.

Keep in mind that after each disassembly, only the well-cleaned and silicone-lubricated rubber parts should be assembled precisely to avoid the unpleasant vacuum leaks, and if it still doesn't seal tightly somewhere, do not tighten the screws too much, but replace the seal or check the parts for cleanliness.

Thank You for reading this article!
bottom of page